All posts by Nancy Holtzman

Nursing in Public

Hi there, mammals. I mean, mamas. We are mammals, and we have mammary glands – breasts –  that serve a function: feeding babies. Whether they’re in use or not, as the saying goes, “that’s what they’re there for.”  So it’s a sad statement on our current culture that we even need to establish legal protections, fight to keep photos on Facebook, or lobby PBS to show the occasional breastfeeding baby “back” on Sesame Street to keep his bottle-feeding friends company.

If breastfeeding were the cultural norm, a nursing baby would be… well, unremarkable. They’d be everywhere. Commonplace. On the bus. In the park. At the coffee shop, in the store, at older siblings’ soccer games. Instead, we need legislation to protect a woman’s right to nurse wherever she is legally allowed to be, so that she can’t be harassed by unenlightened store clerks or hustled away by mall security.

A nursing mom usually just wants to feed and nurture her baby then get on with her day, and isn’t out to make a political statement. Yet, by breastfeeding your baby in comfortable public locations, you are doing something culturally significant each time. In addition to nourishing and nurturing your baby, you’re also doing some subtle public education reminding people that breastfeeding is, in fact, the biologically normal and expected way to feed a baby. In our bottle-feeding society, that’s an important reminder. Though initiation rates nationally are about 75%, fewer than half of American babies are breastfeeding at all by six months, and only one in four babies are nursing at all at one year. The more we, as a nation, see babies nursing, the more normal it will be, and the less fuss – and stress – will be made. So, mamas, do your part, be a mammal and feed your babies where and when you and your baby are comfortable.

My suggestions for breastfeeding when you’re out and about and away from your home:

1. Start early. Practice often.
Nursing isn’t always easy in the early days. Some moms have a very specific set-up at home with a certain chair, foot stool, pillows positioned just-so, and plenty of visibility and patience, to help get their baby latched on comfortably. It may take multiple attempts. There may be tears. The baby cries, too. It can be loud and messy. Keep at it. Get help if you need it. The first two weeks are the hardest. It gets better.

2. Get out of there.
Don’t get locked into the mindset that you need to be at home to make breastfeeding work. Even in the early days, with practice, you’ll begin to find it easier to get out of the house and feed your baby in a variety of settings. You’ll appreciate building flexibility and developing confidence into your ability to nurse on the go. You’ve got to get out of that house. Isolation is painful, and you’ll also discover that your baby is often happier and easier to care for when you’re out and about.

3. First times venturing out? Go where the moms go.
Find out what’s in your area. Breastfeeding groups, new mom gatherings or mom and baby yoga classes are perfect places to start. Being in a clean, nurturing, private location surrounded by other new mothers also focused on caring for their babies makes for a comfortable place to practice feeding. No one will notice or care if your baby fusses, or you fumble a bit.

4. Plan one outing a day with a “Rest & Refuel” in the middle.
Get out every day, but one outing is likely all that’s feasible. DO NOT attempt to rush through your errands to be back home within a two-hour window before the next feeding. Instead, PLAN IN a time and place you can sit and rest, have a snack yourself, and nurse your baby before continuing with your outing. For example, return baby gift and walk around mall, make a pit stop at coffee shop for snack/nursing/bathroom/diaper change, then continue on to the grocery store, then home.

5. Choose your spots wisely.
Select places that are family-friendly and accustomed to children, places where you will feel most comfortable. Coffee shops, book stores, and “ladies lounges” are popular spots to nurse when you’re out and about. Do not nurse in a bathroom stall! If initially you prefer more privacy, your car or a fitting room is a far cleaner alternative. Don’t ask for permission. You don’t need to give anyone power over where you may or may not feed your baby. Want to use a fitting room to nurse? Just grab something off a rack and bring it in with you to “try on”.

6. Fine Dining?
In a restaurant setting, ask for a table where you will feel most comfortable. Some women find a booth gives them more privacy; others (especially those with bigger breasts or older babies) find they don’t have enough room to maneuver and prefer a table with moveable chairs. Some women like to sit with their back to the room, and others prefer to sit facing out. Experiment and find what works best for you and your baby. As an aside, try breakfast or lunch in a restaurant rather than dinner. Young babies are often happier early in the day and tend to be a little crankier in the evening.

7. Park it. Bench it.
In a mall or park, find a bench in a quiet area and park your stroller in front of you, then put the stroller brakes on. Now you have a bit of a privacy barrier and can also prop your feet up on the wheel or basket as a makeshift foot stool. This will help you be more physically comfortable and angle your lap for easier positioning. When the weather is nice, sitting on the grass with your back against a tree for support makes for a lovely “dining al fresco” experience.

8. Used to a nursing pillow? Try these makeshift tricks for extra support and lift:
Fold up your coat or sweater and rest it in your lap as a nursing pillow.
Tuck your diaper bag under your thigh to bring your lap higher.
Roll up a receiving blanket: this may be all you need to support your baby’s head or your own wrist for a more comfortable position.

9. What to wear?
Nursing tank-tops make it easy to turn any top into a nursing shirt. Pull up your shirt from the bottom: the nursing tank will keep your belly and side (aka muffin top) completely covered and warm. A little leaky? Choose tops with patterns rather than solid silky colors, they’ll hide all sorts of splotches from you or your baby. Hint: Always keep an extra shirt for yourself, and an extra onesie and outfit for your baby in a zip seal bag at the bottom of your diaper bag. Babies spit up or have diaper blow outs at the most inopportune times!

10. Nothing to see here, folks.
When a mom and baby are nursing, there’s usually nothing too exciting to see. Take the time to get your baby settled and latched on comfortably, then adjust your clothing, pick your head up and smile. When people walk by and look at you, they’re probably hoping to get a glimpse of “the sleeping baby” in your arms. Take a look in the mirror, or ask a friend or family member to take a photo so you can see… that there’s just really nothing much to see. This might help you feel more confident when nursing in different locations.

11. Nursing Cover Ups?
Breastfeeding is normal and doesn’t need to be hidden, yet each woman has her own level of comfort or modesty. I hope there are many (most!) places where you feel very comfortable nursing, but there may be occasional times or places when you prefer more privacy. Nursing cover-ups offer privacy but allow air to circulate, the baby is not covered by a heavy blanket, and mom and baby can see each other.
Around 4 – 5 months, some babies become more distracted when feeding and a nursing cover may help them stay focused on the task at hand, though some babies refuse to feed under a cover.
Pumping? A nursing cover is also helpful if you have a semi-private place to pump at work. Everyone knows what’s going on under there – baby or pump, chances are, you’re not hiding anything – but if it makes YOU more comfortable, that’s what’s important.

 

Bedtime Routines: Start Early!

Bookends to the Day: helps build some predictability into your daily routine

The bedtime routine: why you probably already have one even if you don’t think you do.

The bedtime routine may be one of the most important habits you can start with your baby, beginning as young as just four or six weeks of age. You may not think you even have a “bedtime routine” but you probably do. Over the coming weeks, it’s increasingly beneficial to help cue him that it’s time to sleep. As he moves into toddlerhood, a well-established bedtime routine helps limit “bedtime battles”. Your baby’s pre-sleep routine should be short and simple enough so that it’s easy to remain consistent night after night, and should ultimately serve the purpose of ending with your baby sleepy and relaxed.

Routines rather than schedules: Bookends to the Day
Aim to begin your routine around the same time most evenings. A strict “bedtime” is not necessary, but maintaining general consistency most nights means that bedtime, night feeding and morning wake up times will gradually become more predictable. Think of the “bedtime” and “morning wake up” time as the “Bookends to the Day”. Having approximate windows of time (generally within 30 minutes in either direction as your baby gets older) will lead to more predictability and will help with building routines. For example, when your baby begins to have a fairly consistent morning wake up time, you’ll find that the first nap of the day begins to happen at a more predictable time as well. Rather than thinking of these as rigid “schedules”, stay flexible and think of creating patterns and routines to guide various part of your days.

Short, Sweet and Consistent
The bedtime routine can be a pleasant, loving, soothing experience for you and your baby and will probably include a final breastfeeding or bottle, fresh diaper and pajamas. Don’t be surprised if your baby cries during part of it: not all babies love the act of being swaddled (but still do sleep better once they are), and some don’t have patience to rock and read books. Keep your routine short, sweet and consistent.

After feeding, washing, diapering and dressing for sleep, begin your pre-sleep relaxation activities.
Parts of the bedtime routine at this point might include: rocking, singing or humming, listening to soft music, bouncing on a ball, swaddling, massage, reading stories, saying prayers or saying special goodnights before bed. Your goal with the pre-sleep routine is to have your baby feel comforted, loved, sleepy and ready for bed, but awake when he goes into his crib.

What about bathing?
You may like to do an evening bath especially as your baby gets older if this is an enjoyable part of your evening routine. Parents do find that babies who enjoy their bath play and seem relaxed or tired out after bathing, so it can be a nice part of the evening routine. Or, you may feel that a daily bath is quite a big production, and is too time consuming or stressful to choose to do each day. Either way is fine.

It’s true that a baby doesn’t need a daily bath. They don’t get too dirty, and you spot clean them when they do, such as after a diaper blow-out. Places to wash morning and evening include the face, neck folds and behind the ears (where dried spit up collects) and your baby’s hands. For babies with dry skin, a daily bath with soap and shampoo can make the skin even drier. If you choose to do a daily bath, only use soap and shampoo a few times a week rather than every day. Add a few drops of jojoba, coconut or olive oil to the bath water on the days you’re not using soap and your baby’s skin will stay soft and silky.

Drowsy but Awake is hard but does work
With practice, most babies soon recognize the routine and fall asleep in the crib with little or no fussing at all. If your baby has a hard time learning to fall asleep from the drowsy state on his own, there are a variety of techniques that can be useful and that don’t include harsh “crying it out” methods.

Environment is key!  Your baby’s sleep environment should be cool, dark and quiet, especially in the early morning hours, with continuous white noise for better sleep.

Tips for holidays and travel with babies

It’s easy for everyday routines to be disrupted during holidays and vacations.
Travel, visitors, parties, new decorations, changes in childcare or playgroup routines, plus alterations in meals, nap and bedtime routines may result in both excitement and stress for infants, toddlers and parents.
Just a few simple steps may help keep a sense of security and routine during these busy days.

Keep mealtimes as regular as possible, or offer healthy snacks if a family meal is being held later than your child might like. Most toddlers have a short attention span in the highchair, so bring along extra diversions to keep a child content at the table a little longer, or allow him to play with quiet toys on the floor next to the table if appropriate.

When traveling overnight, bring along some favorite toys, books, music, and blankets and try to keep to your regular bedtime routine, even if it’s a little briefer than usual. If you usually bathe, read, rock, sing with your little one at bedtime, follow that pattern. Your baby will recognize the familiar rituals, even in a new environment.

Unfamiliar faces or crowded rooms at parties may take your child some time to get used to. Sometimes visitors are so eager to see the baby that they want to rush in and envelop the baby in a hug. Explain to visitors and relatives that most young children need some time to acclimate to new places and people (even grandparents, if it’s been awhile since their last visit). Hold your child and let her watch you interact with friends and relatives first. Wait until she seems more relaxed and shows a willingness to explore the environment or be held by someone new. Using a sling, baby carrier or backpack is a great way for relatives to see and interact with the baby, while parents are still able to maintain the sense of safety and security.

Stay extra-vigilant at holiday gatherings and parties when there are many adults and children present. In a full room, it’s often assumed that someone else is watching a child, when in fact the toddler may be unobserved exploring an area or object that is unsafe or mouthing a potential choke-hazard. Sometimes a well-meaning relative may give a baby or toddler a food or plaything that is unsafe or not age-appropriate. Party foods (including candy, nuts, chips and baby carrots), holiday plants and decorations, and toys for older children are all potential hazards for a crawling baby or young toddler.

Wean Me Gently poem

Wean Me Gently

I know I look so big to you,
Maybe I seem too big for the needs I have.
But no matter how big we get,
We still have needs that are important to us.
I know that our relationship is growing and changing,
But I still need you. I need your warmth and closeness,
Especially at the end of the day
When we snuggle up in bed.
Please don’t get too busy for us to nurse.
I know you think I can be patient,
Or find something to take the place of a nursing;
A book, a glass of something,
But nothing can take your place when I need you.
Sometimes just cuddling with you,
Having you near me is enough.
I guess I am growing and becoming independent,
But please be there.
This bond we have is so strong and so important to me,
Please don’t break it abruptly.
Wean me gently,
Because I am your mother,
And my heart is tender.
Credited to Cathy Cardall
Always makes me weepy. How about you?

Introducing Solid Foods

"Give Peas a Chance"!
All we are saying, is “Give Peas a Chance”!

Rice cereal at four months or at six months?
Or, don’t start with cereal at all – instead, offer avocado or sweet potato to begin.
Don’t give egg whites, wheat or fish during first year, and only introduce one new food at a time. Offer pretty much anything, including traditional allergens, any time after 5 months.
Spoon feed purees. Don’t spoon feed purees, instead, let baby learn to feed herself. Don’t let baby feed herself, she’ll choke. 

When it comes to the topic of introducing solid foods, there are so many conflicting recommendations and opinions, even among the experts and research.

For the past 50 years, the common advice has been along the lines of “sometime between 4 to 6 months, introduce rice cereal (oatmeal if baby becomes constipated), then orange and green vegetables and pureed fruits, one at a time.” It’s possible that all of that is wrong, but on the other hand, going that route may not hurt, either. Yes, it’s clear as mud…

The American Academy of Pediatrics’ recommendation is for exclusive breastfeeding for the first six months of life, (iron-fortified infant formula if breastmilk is not available), with iron-fortified solid foods introduced gradually thereafter to complement the milk intake. This message has been the same for the past 15 years, and reaffirmed in a 2012 policy statement, yet, you will find many conflicting recommendations about when to begin solid foods, how to feed your baby, and what to foods to start with or avoid. Your pediatrician may give you suggestions that are very different from what your friend was told by her pediatrics practice. Some recent research questions the typical recommendations to introduce foods in specific orders and avoid common allergenic foods like egg whites and wheat. It’s possible that delaying the introduction of these foods could actually be causing more allergies, rather than fewer.

What introducing solid foods is all about: Socializing baby to the feeding experience, introducing new flavors, textures and oral motor skills.

What introducing solid foods isn’t really about: Packing in foods in hopes that he’ll sleep better.

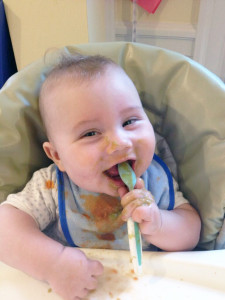
Signs of readiness: Typically around 5-6 months, you’ll notice your baby watching, grabbing, and otherwise showing interest in your own meals and snacks, and she should be able to sit up with support. The best sign of readiness, however, is that once you do begin offering food, your baby gets the hang of it within a few “meals” or over the course of a week: quickly learning to open mouth for the spoon, seeming interested or eager, reaching for it, wanting more. If your baby seems to find it unpleasant and fusses, squirms away, gags or extrudes most of the food back out repeatedly, continue to offer, but don’t push or force your baby to put food in his mouth. If after three or four “meal” attempts, it is not going well and your baby is not enjoying the experience, shelve the food and try again several days or a week later. It’s okay to have a false start and then wait another week before “re-starting”.

Often a baby is happy just to have a bowl and spoon to play with, and to join you at the table in a highchair. Sometimes they want the “tools of the trade” but not necessarily the food just yet. There’s no rush: once your baby starts eating, he’ll be eating for the next 90 years. A few more weeks won’t make any difference.

How much should my baby eat? Some babies sample only a teaspoon or tablespoon of oatmeal or avocado at a meal, while others will eat an entire bowl of cereal and fruit and holler for more when it’s done. Follow their cues; don’t push them to eat more than they ask for. When she leans forward and continues to opens her mouth for the spoon, continue feeding. When her mouth is closed and she is turning away, she’s done. Try to avoid any tension or struggling over feedings and do not push to finish the portion or play the “just one more bite” game. You have way too many years of feeding your child ahead of you to create struggles over food already!

Give baby her own spoon to hold so she won’t grab at yours (she still will!). Let her suck the food off her hands or plastic spoon or teether. Learning to eat is a tactile, sensory (almost) play experience. Babies first learn to swallow by sucking, so it’s common for babies to put their fingers or a toy in their mouth along with the food, to help organize their swallowing and tongue movements as they employ the more familiar suck-swallow-breathe pattern.

Good first food options:

Whole grain cereals: Oatmeal, barley cereal, brown rice cereal, mixed with breastmilk, formula (if already introduced) or water. Avoid mixed grain cereals as a first food.

Vegetables: Carrots, sweet potatoes, orange squash, peas, green beans, beets.

Fruits: Applesauce, peaches, pears, apricots, plums/prunes, bananas, avocado.

Meats: Chicken, turkey, lamb, beef.

Iron rich foods can be served with Vitamin C (most yellow/orange fruits and vegetables) to enhance absorption. Meats, egg yolks, prunes, sweet potatoes, beans, peas, lentils, and iron-fortified rice, barley or oatmeal cereals are good sources of iron.

Note: Diaper rashes are commonly a reaction to change in pH balance of stool after introducing fruits and vegetables and don’t have to indicate an allergy. Treat with a generous layer of a thick zinc diaper cream, and switch to warm water and washcloths rather than diaper wipes if the skin is very sore or irritated. Facial rashes are commonly due to acidic fruits smeared on the face and frequent washing after meals – use a soft cloth to wash after meals, dry well with a soft cloth and apply a moisture barrier to treat red skin on cheeks and chin.

Interested in this topic? Watch my webinar on introducing and advancing solid foods.

Continue to Part Two of this “Feeding Your Baby” Series:
How and What to Feed Your Baby – Traditional methods and alternatives (jars, homemade purees, baby-led-weaning aka baby-self-feeding).


Tips for New Eaters: Finger Foods

"Bag Cheese" is a real winner here!
“Bag Cheese” is a real winner here!

Are you moving from spoon-feeding purees to starting to offer bits and pieces of food? Here are some tips that address common questions new parents may have during this transition.

1. Not so big. Bits of food for self-feeding should be about the size of your baby’s thumbnail, or smaller than a dime. Bits of toast, waffles, pancakes, French toast, grilled cheese sandwiches and muffin bits are usually well-received by babies and are easy foods for them to manage.

2. Nothing hard, sticky or chewy. Hard foods like raw carrots or apples can be sliced then steamed before offering. Raisins may be soaked in hot water to soften.

3. Avoid round foods and coin-shaped slices. Foods like grapes, steamed carrots, string cheese sticks, hot dogs  (a whole other can of worms) should be chopped small to reduce the risk of choking.

4. Teeth aren’t needed to chew. As long as the foods you offer are soft enough for you to to squish between your thumb and forefinger, your child should be able to chew them just fine with his gums even without molars.

5. Offer a preloaded fork or spoon if your child is eager to feed himself. Reduce frustration by using foods that stick to the spoon (like yogurt) rather than foods that drip off  (like soup). Soft cooked elbow macaroni makes a good introduction to fork feeding.

6. If your baby stuffs too much in his mouth at once (or throws it all on the floor), just offer a few bits on the tray at a time and add more pieces after the first few are eaten.

7. Skip the kids’ menu at restaurants. Offer bits of chicken, baked fish, meatball, potato, rice, pasta, steamed vegetables, baked beans, roll. Make steak “shavings” by scraping at the surface of the steak with a knife.

8. Say “cheese”. Shredded mozzarella or Monterey Jack cheese in the zip-seal pouches (called “bag cheese” in my house) sprinkled on the highchair tray is a speedy snack that can keep a snacking baby busy for awhile.

9. It’s okay to help. Your baby does need to learn how to feed herself, but it’s okay to pop in a bite here and there or spoon feed purees or mashed food in addition to foods your baby picks up.

10. Sensory-Sensitive. Some babies are especially sensitive to the sensation of textures or dislike having their hands dirty. Use dry foods like toast bits, rice cakes or cereal rather than mushy food like banana slices to practice finger-feeding and hand-eye coordination.

Bonus: Respect your baby’s cues and don’t try to push in more food than your baby wants. “One more bite” really won’t make any difference in terms of your child’s nutrition

Oral Motor Muscle Stimulation Exercises… For Babies

This may be cute (sort-of), but it’s certainly not the technique I outline below

Sometimes babies need some help “waking up” all their sucking muscles prior to nursing or taking a bottle. Other babies simply seem to latch or eat solids (purees or textures) better several days after starting these exercises.

Oral Motor Muscle Stimulation massage techniques as follows:

Remember to do each movement several times, with gentle pressure, slowly and deliberately. The entire “routine” should take less than 30 seconds.

  1. Cheek circles (gently move cheeks in circular motion, and inward to make “fishy lips”. Repeat x5
  2. Over the ears and under the jaw. (With both hands, stroke from each cheek to the temples, then around the ears and under the jaw. Repeat x5 )
  3. Trace top lips and bottom lips with finger (“applying chapstick”) x5.
  4. Trace down from nose to lip to chin. Use finger or knuckle to (slowly) gently stroke from bridge of nose down to top lip, bottom lip and chin, gently rolling bottom lip out (only if baby allows) and gently press chin down as if opening mouth (only if baby allows).

Notes:
1. If you are working on tongue extension, remember to stick your tongue way out several times while massaging and praise baby for mimicking the motion.

Sore Nipple Comfort and Healing

Here are some suggestions and useful products to help sore nipples heal and feel better quickly.

  1. Warm Soaks or Compresses – two or three times each day, apply a warm wet washcloth to your nipples, or lean forward and lower your nipples into two bowls of warm water placed on the kitchen table. After your warm soak, then apply a thin layer of lanolin cream or a few drops of expressed milk onto the nipples. This process of rehydrating the skin of the nipples speeds healing and reduces scabs. Applying breastmilk also helps prevent infection if there are any cracks or open areas on the nipple.
  1. Hydrogel Pads – these soothing pads are placed against the nipple and held in place by a bra, in between feedings. Hydrogel pads feel a bit like a cool sheet of gelatin and provide a healthy environment for the skin of the nipple to heal more quickly. They feel fantastic against tender nipples, and since many moms like using them when chilled, you may want to keep gel pads in the refrigerator between uses. Alternate using hydrogel pads with breast shells for best results.
  1. Breast Shells – one of the most helpful products for new nursing moms, these are comfortable dome-shaped small plastic cups worn over your nipples and held in place by your bra. Breast shells help the skin of the nipple heal (and provide great comfort) by preventing anything from pressing or rubbing against the nipples between feedings. They are especially helpful for women with nipple damage, since a bra or nursing pads tends to flatten or fold the nipple back into the breast tissue, interfering with healing. Breast shells should have air holes to allow for circulating air around the nipple.
  1. Ibuprofen – Ibuprofen (Advil or Motrin) can be useful to reduce swelling and provide pain relief. Ibuprofen works best when taken every 6 hours as needed. Ibuprofen is considered safe for use by breastfeeding women and is approved by the American Academy of Pediatrics for use with nursing mothers and infants. As with any medication, check with your health care provider for recommendations for your specific situation.
  1. Experiment with different pillows and chairs. You may find that a bed pillow or couch cushion works better than a traditional nursing pillow, or, you may decide you don’t need to use a pillow at all. Try different chairs, couches and positions too until you find a combination that lets you nurse without having to hunch over to feed, and make sure your body, arms, and hands are comfortably supported. A folded cloth diaper or rolled baby blanket is the perfect size to tuck under your hand for additional support.
  2. Nipple Shields These thin plastic “nipple protectors” are worn during feeding, and may be useful in certain situations, such as when a young or small baby needs help staying latched to the breast. Nipple shields are also used to help coax a non-nursing baby to the breast, or when a nipple is too sore or damaged for “direct” breastfeeding. However, nipple shields are often purchased and used without professional advice and in some situations can lead to milk production issues or poor infant weight gain. A nipple shield should never be used without guidance and requires follow up and support to gradually transition away from using the shield. Pumping after breastfeeding several times each day may be recommended to ensure stimulating a strong milk supply when a nipple shield is being used.

Some initial nipple pain or tenderness can be normal, but should improve within a few days. Severe nipple pain that makes you dread the next feeding, or nipple damage like cracks, scabs and blisters can be improved – often with small adjustments to latching and positioning.

Does My Baby Need Water? Introducing Cups and Drinks

When the weather gets warm, parents often wonder and worry about their baby’s hydration. During an infant’s early weeks, parents are warned that water is dangerous for babies, so the very idea of putting water in a cup or bottle makes parents nervous even beyond the newborn stage. However, midway into your baby’s first year, offering water in a cup for fun and practice will be a learning activity that helps keep your baby cool (and wet!). What should you know about offering water to your young child?

From birth – 3 months:

No water for newborns. Newborns have tiny bellies, so a bottle of water would take the place of important milk calories needed for growth and development. And because a newborn’s body is small, too much water can alter the normal electrolyte balance necessary for heart and brain functioning. Bottom line, newborns should not be given water. Breastmilk or properly mixed formula will provide the correct balance of liquids needed for hydration and thirst, even when the weather is very hot.

From 4 – 6 months:

Not dangerous, not necessary. An ounce or two of water once a day at this stage isn’t dangerous, but isn’t necessary either. Breastfed babies may nurse for very short periods of time during hot weather, when they are thirsty (rather than hungry) and research shows that even in tropical environments when the weather is above 100°F every day, breastfed babies do not require any additional liquids. For formula fed babies, check with your pediatrician for recommendations. Some pediatricians will suggest offering an ounce or two of water in a bottle if the weather is very hot while others say stick to formula only. Water should not take the place of a breast or bottle feeding, and formula should never be diluted beyond the proper mixing directions in order to offer additional water.

Around 5 – 7 months:

Introducing a cup:
At this age, babies are interested in holding and mouthing objects, and may be ready to explore the skills of drinking from a cup. Choose a sippy cup without a valve initially, so that the cause and effect of tentative sucking pays off with an easy result of water. Pick a small-sized cup of 4 – 6 ounces, because it’s best to fill the cup all the way up to the top so that your baby won’t need to tilt the cup all the way up and lean her head back in order to get water (that’s a lot to coordinate)! A larger cup filled all the way up becomes too heavy for small hands to hold and easily manipulate. Make sure your baby is in a supported upright position when given the sippy cup. Your baby might cough and splutter a bit but will soon learn how to coordinate the sucking and swallowing required for drinking. Your baby might also enjoy squirting the water out of her mouth, and getting wet is part of the process. You can also offer sips from an open cup with assistance.
Water at this age is just for fun and practice. Your baby will still receive full hydration (and nutrition) from breastmilk or formula. Once started, common baby foods including pureed fruits and vegetables are also very high in water content and will add to their liquid intake.

What to put in the cup? Water! Just water.
Give your child a taste for water from early on. Water is the best and healthiest drink for children and adults. Filtered tap water is usually a safe and healthy option. Check with your area’s Department of Public Works to find a link to your town’s water source if you have concerns about lead or other contaminants, or want to know how your water is sourced or tested. Information about fluoride will also be publicly available. Bottled spring water and “nursery water” adds additional expense and environmental waste that may be unnecessary if your tap water is safe for drinking. If it is suggested that you boil water for cooking or drinking, bring to a boil for only 3 minutes, which is long enough to kill bacteria but short enough so as to avoid concentrating any minerals that might be in the water.

What about juice? Wait to introduce, then use sparingly if used at all.
Juice is really just Nature’s Kool-Aid and ounce per ounce, actually contains the same (or more!) sugar and calories than Coke and Pepsi! Sure, juice contains natural fruit sugar, but it’s still just sugar (and a lot of it), adding up to considerable extra calories without offering any significant nutritional benefits. Juice also bathes tiny teeth with sugar and can lead to dental cavities, especially when a sippy cup or bottle of juice – even diluted juice – is sampled frequently throughout the day or night. The concentrated sugar load in undiluted juice can also cause diarrhea or diaper rash.

Think of juice as a treat or add-on, but not as an important part of your child’s daily intake. When used, limit daily juice intake to 4 – 6 ounces a day in total, and dilute juice by 50% (for example, 2 ounces of juice and 2 ounces of water). Even though this reduces the total amount of sugar and calories, it’s still a sugar bath for the teeth.

A good approach is to put only water in a sippy cup for daytime use, and save milk or diluted juice to use at the table during meals, while practicing drinking from an open cup. Keeping to this policy of “only water in the sippy cup” will save you the unpleasant discovery of finding a sippy cup of moldy juice or milk that has rolled under the couch! (And hopefully you find it before your toddler does!)

Interested in this topic? Watch my webinar on introducing cups, straws, milk, “milks”, juice and water (also Baby-Led Weaning is covered in this webinar too)

Learning to Sit: Tripod Sitting Position

Learning to sit: Tripod Position

Laila Rose tripod sit
Laila Rose shows off a lovely tripod or “propped” sit at almost five months old.

Once your baby’s neck and trunk muscles are strong enough, he’ll be ready to learn to sit up independently.

Although you can prop or support your baby in a sitting position by around three months, independent sitting doesn’t begin until your baby has sturdy head control and strong trunk and abdominal muscles to keep his head and spine in an upright, aligned position. Starting at about four months, your baby’s neck and head muscles strengthen rapidly through play, and he’ll learn to raise and hold his head up while lying on his stomach. That tummy time is important to strengthen the arm, shoulder and neck muscles that are needed for propping himself up in the sitting position, and later, to help with crawling.

At four months, your baby may have been able to prop himself up on his bent forearms for short periods of time, and at five months, he can probably push himself straight up with unbent arms and hold his chest off the ground, like a little pushup. Once he can do this, he probably also has the muscle strength to be able to practice a Tripod Sit.

Tripod Sitting is the term used for a baby who is sitting, but uses his arms as the tripod, the third “leg of the stool” to keep his body upright. Sit with your baby on a carpet or foam play mat and help position his legs with his knees pointing out toward the sides, and his feet several inches apart. Tripod sitting is also called “ring sitting” because the legs form an open ring position. This position gives him a wider base of support for more stability. Help him position his arms within the “ring” of his legs in the front, so he’s leaning slightly forward propped up on his hands.

His head is still heavy, so when tired, he’ll probably “melt” forward toward his feet, essentially folding himself in half – it looks quite uncomfortable to adults but babies don’t seem to mind much – and will either play with his toes, or end up rolling to one side and onto his back. When practicing tripod sitting and being distracted by someone walking by him in the room, he may turn his head to watch, and even that small movement may take him off balance, and over he’ll tumble!

As he practices tripod sitting at six months, you’ll see that the more you practice, the longer he’s able to maintain the position… until he decides to pick his hands up to reach for a toy or put his hands in his mouth. Then, over he will go. But after several weeks of tripod sitting, you’ll begin to see that he can lift first one hand, then both for short periods and still remain upright. Watch and notice that he is developing a sense of balance – as he feels himself tip to one side, does he begin to use that arm to stabilize himself back into an upright position? Exciting!

TLDR: Most babies can sit with support or tripod sit by the end of six months, and can sit well without support by eight months. Tummy time doesn’t go away, it transitions into floor time and is important for muscle development.